Quantcast
Channel: ♡♪ misaraisu ♪♡
Viewing all 95 articles
Browse latest View live

Shopping Experience at Sociolla

$
0
0

There's nothing more satisfying than scrolling, browsing things you need or don't even need but you want them anyway. For me, I get that satisfaction every single time from online shopping. Don't get me wrong, I like shopping, looking at new things and even trying the products physically in person. But there's always something exciting about shopping at ease, without any hassle at the comfort of your home. At least that's how it is for me. 

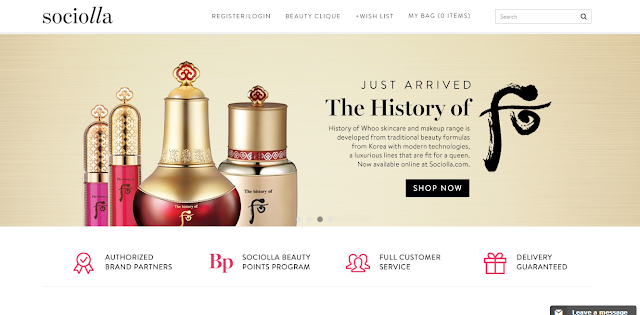
I always like it when I find new online stores that look interesting and promising. And this time I found an Indonesian based online store called Sociolla. I actually found it for the first time (yes I might be living under the rocks for the past year) when I won a prize from Canmake Makeup Contest few months ago. One pf the prizes was shopping voucher from Sociolla. At the time, I had no idea what that was, but after my first visit to their website, I learned that they carry a lot of western brands like The Balm, Bourjois, Real Techniques, Maybelline, Guerlain, Philosophy, and even asian brands like Canmake, Laneige, History of Whoo, SK II, Dr Jart, Menard and more. I actually had a hard time picking which I should get and try from the shopping voucher I got. But I like how the website is easy to navigate and I can easily find what I'm looking for with the nice interface. 

So before I ramble even more, I'm going to show you what I got from Sociolla. 


sociolla
My order came in a pretty pink box.


The products I got in the box are Canmake Strong Eyes Liner, Studio Makeup Gel Eyeliner, Canmake Eye Nuance, and Mavala Cuticle Oil. They also include 15% discount coupon code on my next purchase. 

I haven't really posted new reviews lately, but I'm planning to review some of these products next time. I use all of these regularly. Here is a brief review. I really love the Canmake eyeliner to my surprise, it's really great and I love how precise the felt tip is. On the contrary, Studio Makeup gel liner is probably my least favorite among this mini haul. It looks nice and intense, it also comes with the brush but it smudges easily. Canmake eye nuance is really lovely I love the shimmery cream ish shade, but I wish the dark brown can be more pigmented. On the other hand, Mavala Cuticle Oil is my everything!!! I just randomly picked the first cuticle oil I found on Sociolla cause ever since I do my own acrylic nails lately, I desperately need cuticle oil and this one is breathtaking lol. A little goes a long way, and I never forget to apply the oil everytime after I finish doing all my nails. It saves my cuticle a lot of troubles. 

Now that I received my order, I want to recommend this awesome shopping experience and service for you guys too. 


GUARANTEED SHIPPING
The order was processed pretty quick and with no issue. But what amazed me is, my order got delivered to me in one day, yes 1 day! I'm located in Jakarta and so are many other stores I purchased from before, but nobody ever delivered what I ordered before within 1 day that's just... so fast and convenient. 
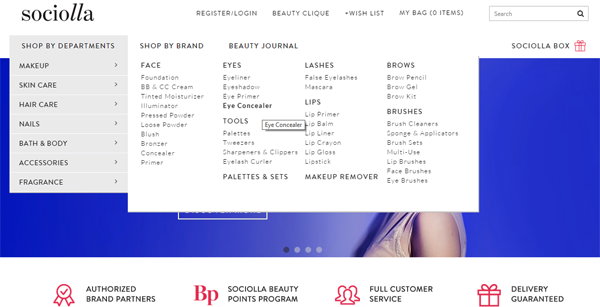

EASY NAVIGATION
When you don't know what to see and check out, just hover on the shop by departments and you can see their categories for each departments and just click what you need to find. This navigation helped me a lot into finding what I might need and want. 

HELPFUL BEAUTY TIPS
Aside from the easy to navigate website, which I mention earlier, the website also has a section called Beauty Journal, which basically a page full of all things beauty tips and tricks; from makeup reviews, celebrities hairstyle, to trending makeup tips and many more. 


BEAUTY POINTS AND CLIQUES
Earn beauty points as you shop. For every IDR 50,000 of your purchase, you'll get 1 Beauty Point.  Beauty Point can be redeemed in your shopping cart when you're checking out. Beauty Cliques is another interesting thing from Sociolla. Every member is eligible to receive benefits of each clique. We start from Pink Clique, and as we shop and accumulate points and amounts, we can rank up to a higher clique (like high school but less catty and nicer? lol) with better benefits. 

After writing this post, I feel like going to Sociolla and find some things I need to get now because I haven't really purchased anything since my first order. And they've added more brands and new products since my last visit. That History of Whoo's Gong Jin Hyang Mi lipstick is so tempting too. Unless I search really hard on some local online shops, I don't really know where else I can shop The History of Whoo products, let alone try it. But glad to find this brand now available on Sociolla too :D So I'm just going to take more look on the website to find other newly added brands that I missed. 

Thank you for reading hopefully this post is useful if you ever want to shop and have a nice and quick shopping experience! Visit Sociolla for more. 


NYX Studio Liquid Liner Review

$
0
0

I'm all about thick black eyeliner, I don't think I can go out without it. Well, not really, unless it's emergency then I have to. Colorful eyeliners aren't really what I'd use daily, or even monthly to be honest. I think the last time I applied one was probably two years ago. But this time, I was open to the idea of color liquid liner again after I got one from Sociolla a while ago. It's NYX Studio Liquid Liner in XT Blue. It looks like cobalt blue to me, and the moment I received it I was in love with the color based on what I saw on the packaging. Then I wonder what kind of look I'd do using this color liner, as my usual gyaru makeup look is normally more of neutral colors with brown, bronze and pink. I rarely do blue, especially cobalt blue. But then working with colors on my face can be fun, when I'm not in a rush or being lazy.

Anyway, back to the product, on the packaging, it already says that it has dramatic color payoff but of course I wouldn't believe it until I try it firsthand. So keep reading to see more about this product. 


It's been raining too much lately that I could barely take good picture with decent lighting. Especially since I always get home around 6-7PM after work and the sun is obviously already gone by the time I go home. I need to invest in ring light or some lighting possibly in the future haha. So yeah, because of the dark days lately, I took a long while to take good picture especially for this one post that I forgot to take detailed pictures of the close up product and brush. But this liquid liner has the normal brush like other liquid liners. It's thin and small so it has quite good precision when applying. It's not stiff, and doesn't hurt or irritate my skin during application. 

nyx studio liquid liner review xt blue

As shown in the picture, it has amazing color payoff. I don't need to use a lot of product to get them to look pigmented. It is very pigmented, and the downside is if I make mistakes accidentally, it is kind of hard to hide it and the only way to do it is with makeup remover and cotton swab. I normally apply the liquid liner on my inner corner of my eyes to the middle part of my lower line. 

nyx studio liquid liner review

PROS
- Affordable
- Great color payoff, very pigmented
- Doesn't smudge
- Easy to remove with makeup remover
- Great precision brush tip
- Cruelty free
- A little goes a long way
CONS
- Too pigmented, better not make any mistakes 

OVERALL 4/5

WHERE TO GET
Sociolla for IDR 120,000


nyx studio liquid liner blue review

nyx studio liquid liner blue

I really like how this liquid liner look on my eyes. I didn't put much but while I might not use this on daily basis, I'll still use the NYX Studio Liquid Liner when I want my eyes to stand out more on special occasion. That's all for today's review, I'll be back with a new review, which is the lipstick I'm wearing on the picture above. Thank you for reading and I'll see you on the next post! :)


The Reason Why I Went MIA in 2016

$
0
0

Hello.

First off, happy new year 2017! I wish you all the good things and may this year be a better and more accomplished year for everyone.

I actually debated a lot whether to continue this blog, my activities in social media (which wasn't much), and if I should really "retire" from the internet and basically everywhere. 2016 was a difficult year for me. Actually I'm not sure if there are still people who follow and read my blog or not, seeing how I disappeared for a long time. I notice that in 2016 I only wrote 3 posts on this blog: an event report, shopping experience, and a short product review. It wasn't much compared to how I used to be quite actively blogging and posting on my facebook & instagram the past couple years. I really think hard for the past several months how to write this post. I hesitated, then convinced myself to gain the courage to do it, then I debated and argued with myself there might not be a single soul that still remembers who I am, and it goes on for a long time. 

I don't want to waste anyone's time to read this 'confession' or rather 'explanation' post for people who visit my blog to read other beauty related posts. So I put this jump break and for those who want to read further, please click more :)


To be honest, it all started around the end of 2015 although I think I've known about it a little bit longer. I have depression and anxiety. My anxiety developed more in 2016 but since 2015 I was so depressed. I didn't know how to deal with it. I still don't for the most part. Around January 2016, I just felt like I didn't want to do anything. I didn't want to go out, I was scared to go out and be around people, including some friends and acquaintances. I do have some close friends here and I did distant myself from them, all of them, including my best friends for 15+ years. I just felt nothing. I was always tired and everyday felt like another lifeless day for me even when I just woke up in the morning. I had trouble sleeping at night too. I'm sure many people with depression and anxiety know how it feels. I just wanted to be alone, all by myself, didn't want to see and talk to anyone. I still posted on facebook, blog and instagram here and there at first but slowly I reduced my social media activities and completely disappeared and logged out, deleted all of them off my phone. 

I felt guilty and bad whenever I remembered my friends, but I didn't have the courage or enough reason to tell anyone how I was feeling and suffering. I did try few times with some friends around me and even to my own family, but of course the lack of knowledge about mental illness made them think I was just pretending and seeking attention. Really though, I didn't want attention, in fact I wanted them to go away far from me and leave me alone. But none of them understood and with the constant "you're just thinking too much" or "it's just in your mind" and "it'll disappear very soon" or "you're not the only one suffering in this world" and many more of those disheartening words everytime I confided in them made me feel so hopeless I didn't want to deal with anyone anymore. 

I didn't get treated intensively and didn't see therapist regularly because I just couldn't believe in anyone, including professionals because my mind was constantly so negative about everything and I only trusted myself. I thought I would be okay after some time, and that I would feel better if I calmed myself down and found some peace on my own. 

Of course, I didn't. 

There were times I missed what I used to do and love: makeup and blogging. I did check my blog, email, and social media accounts. There were parts of me that missed everything, while some side of me started to hate myself for leaving the things I loved and suffered by myself instead of trying to overcome it (but it was so hard for me to even try), and other parts of me wanted me to quit all that cause it all started to bother me I didn't know how to deal with those feelings. I think even now I can't really describe how I felt last year in words, it was all just too much. I always ended up crying for hours in silent under the blanket because I didn't want my family to see me in that state. 

The worst part for me was I had to pretend to be "normal" for my family and work. I hated it when I forgot to act normal and then people asked me what's wrong and why I looked sad, I couldn't tell them. So I just pretended to be normal and sometimes my past bubbly self in front of people at work and home. It was like wearing a mask, just so they wouldn't question me, or pity and worry about me.

I knew I probably angered some of my friends with the way I thought, but I couldn't help it. I mean some friends that really cared about me of course. Eventually I started replying some friends' messages after a while later. I did tell probably couple of them how I felt and what happened with me the past several months. Some gave me a really great supportive messages which really helped me. I also met some great friends I considered sisters and real family who really understood what I was going through, who didn't judge me. I am still so thankful for everyone who still support me in my hardest time, even when I couldn't be a real friend to them.

Oh, and even my boyfriend I started to have few issues with him which I didn't have before. I was always so anxious with him. Little things he did and didn't do made me so angry, anxious, sad, worried, and everything unpleasant. We argued a bit too much and there was time I thought I just wanted to be alone without him, I didn't want to do anything with him anymore. But luckily it all went away when he visited me last July. It reminded me how I still have someone who really loves me and care about me. It wasn't like throwing tantrum because I missed him. But his last visit really consoled me, and made me so much calmer and he is a really positive person so he kinda counterattacked my constant negativity and made me so peaceful for the whole 2 weeks he was here. I began to get some sleep at night (except when I heard him snoring so loud even from another room lol) which I didn't get the past 6 months. The little things he did made me feel so calm and less negative about many things. 

After he went back home, I was still getting better, still so depressed but less anxious in some things. But overall I felt quite relieved and less negative, and as I went back to my usual home and surrounding, I had to be the bigger person again everytime and had to act normal again. I just couldn't deal with all those again, especially with some family problems I had to deal also it made everything worse. 

But then slowly I could open up to some close friends, and boyfriend sometimes. I really didn't want to burden him or make him so worried about me that I didn't always tell him whenever I was so depressed in the middle of the night that I cried nonstop. Sometimes I told my other friend instead, and she would help me get through what I was feeling. It was kinda hard to explain but yeah... basically the pressure at work and in life pretty much took a toll on me and with my depression + anxiety, I just constantly felt too much, more than what I could handle. I didn't want to care about anything, then at the same time I cared too much about those little things and it all really upset me and tired me out and just I don't know how to describe it actually. I think I'm rambling nonsense now I'm sorry.

Then last December I was just started to feel like I wanted to try to better myself and overcome this. I've been anti social for too long, I didn't even look up what's going on in the beauty and makeup world anymore. But I was getting interested more with nail art. Doing nail art (even though I'm not that good) gives me peace and makes me feel calm. I made few nail videos but with my social awkwardness still going on, I didn't show my face because I just didn't feel comfortable enough to do that. I used to take selfie everytime everywhere like a shameless person I was. But with this depression, I didn't even want to look at my own face in the mirror. I stopped caring about how I look, I didn't put makeup on and didn't even treat my skin anymore. I just didn't care about all that. So when I came back to instagram and facebook last month, I was so amazed with everything and everyone. It was like a new world again for me. 

But I managed to put some makeup on again and take some face and makeup pictures. It appears that I still enjoy putting makeup on on a good day. I start to reply to friends' messages, and talk to people more (online of course). Because my best friends for 15+ years don't even live close to me anymore so I can only talk to them via text anyway. When I came back to my facebook, I was just so touched how some friends still talk to me normally like I was never gone. The whole time I felt so bad because I just disappeared without any messages and felt like I owe them explanation. But my friends actually welcomed me back warmly and their supports mean the world to me. 

I'm really sorry this post really goes all over the place now. I'm having so much emotions as I type this at the moment. I was actually writing this to let you know how I was doing the time I was gone, but it ends up being this super long full of nonsensical words. I still have a lot to tell you about that, and some other things that happened in between and etc but I don't think I should continue this more because I can keep on going and it will be a short autobiography of mine. I don't know why I didn't do this sooner. I mean, writing actually soothes me a bit and helps me clear my mind. Even though today I write like a kid without direction and just go on like this and it may sound so weird for you who read this. I'm sorry again. But I guess partly why I didn't open up sooner to my close friends was because I didn't want to be depressed around them or made anyone upset with my gloominess.

Also, the last thing that convinced me to go back and do the things I love is when my friend, Rini passed away just two weeks ago. I regretted a lot of things whenever I think of her. She reached out to me quite a lot of times during my MIA days. Actually one of the first person who I thought of when I was deciding to go back was her. I was just thinking on my own how I should tell her why I disappeared on her the past 8-9 months. We were just liking each others posts and messaging shortly. She just liked my picture the night before when that day she had an accident and passed away. I think many of some beauty bloggers friends already know what happened. That day when I saw the news I cried nonstop because I really missed her and I felt so guilty why I didn't reply her and distant myself for the past 9 months. And there, suddenly I remembered her words when she told me that no matter what I should be real and go on with my blog, which we talked a bit when I was having a hard time. I remembered our conversation when we were in my car. The things we talked about, laughed at, and how we sang and got our silly button on. I just regretted everything. She was so young and talented with so bright future, and her accident reminded me what she told me before, and when she encouraged and supported me about some stuff I wasn't confident in... It just reminded and convinced me even more that I really should continue doing what I loved to do, and still love doing. So aside of my friends who've been supporting me all this time, I also deeply thank Rini for all the things she's done and said to me. I will never forget her and her words. 

I don't know now if people still read it at this point. But I will continue blogging. And if you still follow me on social media, you see I'm slowly posting on my accounts, not everyday but I'm  trying to do it slowly in my pace. I didn't pour all my thoughts in this post and hold myself back because I don't want to bore people even more with my depressive post, but you know how to contact and message me if you want to talk more.

And to add a little, currently I'm feeling better at the moment. I try to be more positive and not to bottle it up alone. I feel like I'm ready to meet my friends again now, maybe not every week like before but I guess it's a good change? I hope. I still feel awkward around many people, but the past month I think I talked to my friends more than I did the past year, so I guess it's an improvement. I don't think I will fully 'cured' as I still get panic attacks and depressed at some moments, but I'm trying my best to live my life and I believe with everyone's supports, I think I can be a bit more 'normal' and feel better. 

I sincerely thank you to everyone who've been there for me, support me and being my friends all this time. I'm sorry for this too immature, too emotional, too all over the place post. It's now 2017, and though I'm not miraculously cured and go back 'normal' and bubbly, but I will try to not stop doing what I love to do. And like what some of you told me, I'll open up more and not bottle it up by myself. Thank you again for reading. Hope to see you soon in my first real beauty related post.

Happy new year!

Ps. sorry for a lot of writing and grammatical mistakes.

Extra thank you to Yomo-chan, Sera, Henry, Mira, Momo, Raimar, bby Joanne, Fio and Yoan.

Vassen Crystal Gray Circle Lens Review

$
0
0
vassen crystal gray circle lens review

Hello, I'm back again today to share my review on this circle lens I received from LensFlavors for review purposes a while ago. I've had it for a long time now and I've been using it a lot as you can see in my recent photos on my facebook and instagram. I only own like 3 circle lenses at the moment but this must've been my recent favorite as it's quite natural (for me) without huge black rims and quite right for my daily wear. As always, it's a Vassen circle lens, my favorite lens brand. I think most of the circle lenses I had and reviewed before were mostly from Vassen as well. 

Anyway, I'll talk more about this circle lens below. 


Just like the usual circle lens, this one also comes in vial bottle and here is the information taken from Lens Flavors webpage.

Diameter: 15.0mm
Water Content: 38%
Base Curve: 8.6mm
Usage: 1 year disposal
Includes: One pair of lenses and one Macaron lens case

I'm used to wearing 16 mm lenses before that this lens feel a bit unusual at first on my eyes, but like I said earlier this makes it more natural with the relatively small diameter and simpler design.

vassen crystal gray circle lens review

COLOR 4/5
It's a very pretty grey ish on the eyes, but also depends on the natural eye color. As you can see from the photo above, I have relatively smaller iris so the outer part of the circle lens looks more light grey. I really like the design, even though it looks less anime like. Under natural light, it's normally so natural on dark brown eyes like mine, and not too over the top. 

ENLARGEMENT 3/5
The diameter of this lens is only 15.0 mm so it's not that enlarging. But as I have very small iris, these still do a good job in enlarging my eyes. 

COMFORT 4/5
Since the diameter isn't that big unlike some other circle lenses I had before, I must say this crystal lens is pretty comfortable. But my eyes are on the drier side normally because I always stay in air conditioned room for 8-9 hours a day, so I always have lens lubricant ready and drop it few times a day to keep my eyes moist. 

OVERALL 4/5
This circle lens is just pretty. The design reminds me of EOS Ice a bit. It fits as my daily contacts that I wear almost everyday (sometimes I don't wear it to work when I wake up late in the morning). In natural lighting, this lens almost unnoticeable and blends with my natural eyes. So I must say there is almost no cons to it and I really love wearing this. 

WHERE TO GET
LensFlavors for $26.90 with free shipping

vassen crystal gray circle lens review
this pic was taken 10 secs before I had to go out so its blurry ;-;

vassen crystal gray circle lens review

This is all for my review on Vassen Crystal gray. I love this circle lens this much that I got the green color as well, which I will post on my next soon to show you the color. Thank you for reading~ Hope you like it and I'll see you again on my next post ^^


Follow me on: instagram | Facebook | Youtube


 Disclaimer: The product mentions above was sent to me for review purposes. This post is my honest thoughts and review, I didn't get paid any compensation to write this post.

Laneige Two Tone Lip Bar Review (Pink Salmon and Pink Step)

$
0
0
laneige two tone lip bar review


Laneige is one of my favorite Korean brands and I was excited the first time I saw they released this lipstick line last year. Yes, I've had it for too long and haven't reviewed it still. This was sent to me for review purposes last year. I've used it quite often in many occasions that I even got the second lipstick last month, and finally I'm writing my review now. By now, two or even three tone lip tints are nothing new. This product reminds me of VDL lipstick that I reviewed last year, and I also got the similar peachy orangey shade as that one. And just recently I got another shade of this lip bar, which is the pink reddish one.

Keep reading if you'd like to know more about these lippies!


laneige two tone tint bar review
laneige two tone lip bar review

As you can see, the first lip packaging is from the one I got last year, which is no 3 Pink Salmon. And it has different packaging from the new shade I got last month. Granted, they probably came from different batch and released year so maybe it's just that, no biggie. But it's pretty amusing that the box packaging is different ant the new one has more holographic to it, which isn't visible on the picture above.

laneige two tone lip bar review

laneige two tone lip bar review

laneige two tone lip bar review
 Just the box with the shade number name, and swatch. Expiry date was printed on the back of the box top cap so please check before you throw away the box packaging ^^

 
laneige two tone lip bar review


The lippie packaging is the usual Laneige style, plastic white with metal ish. To open the product you can just pull up the cap. 

laneige two tone lip bar review

Feat my ugly nails from last year lol. Anyway, what makes this different from normal lipstick is it has some kind of button on the side. So after you remove the cap, you pull the button down to use the lipstick. Make sure the button is on the top before and after use.

laneige two tone lip bar review

laneige two tone lip bar review

This is the pink salmon, no 3. 

laneige two tone lip bar review
And the other shade I got is no 6 Pink Step.

laneige two tone lip bar review

After one year, the pink salmon is like this lol and this is why I didn't swatch the products the first time I got it. I was scared I'd ruin and mix the colors. It's probably my OCD though with two tone lips. Even though eventually I ruined the lip bar, as seen on pink salmon lippie.

laneige two tone lip bar review

Depending on how you wear it, the results may be different. I know it looks different on my lips from day to day. Sometimes the pink salmon looks so orange, sometimes it's too coral, sometimes a mix of both. If you still like gradient lips, this may be the perfect lippie for that. I still love glossy gradient lips from time to time. Well, as I have dry lips I still prefer glossy over the trending matte lips, but that's me ^^ 

Applying this lippie can be tricky at first as you have to flip it a certain way to get the colors or style that you like. But for sure, always always put lip concealer on first before applying your lipstick as it results in better color payoff. So either for full lips or gradient lips, I say this lippie is a really perfect lipstick. I mean, Laneige lipsticks are one of my favorites so this Laneige Two Tone Lip Bar is no exception! 

PRO
- It is a two tone lipstick with 14 colors to choose from
- Nice packaging
- Pigmented
- No more twisting to get the product out, just adjust the button on the side
- Easy application; swipe, flip, swipe... or dab for softer diffused upper lip
- Pretty moisturizing
- Decent lasting power

CONS
- As always, it's Laneige, so the price might be a little pricey
- The side button might also be a downside if you forget to put the switch button up before closing the cap

OVERALL 4.5/5
 Yes, Laneige Two Tone Lip Bar is a nearly perfect lipstick. At least for me. It's just so convenient with the side button to take out the product without twisting. It's pretty moisturizing and pigmented. But people with pigmented lips need to put lip concealer especially to get the best color payoff. As I haven't tried the other colors yet, so these two Pink Salmon and Pink Step are two of my favorite glossy lipsticks. If I have to compare with Laneige Serum Intense Lipstick, it's almost about the same but since this is a two tone lipstick I'll choose this one over serum intense. 

WHERE TO GET
Jolse for $20.38 (original colors) and $22.93 (new colors)

laneige two tone lip bar review
sorry I didn't realize I didn't turn off auto soft skin on my camera
laneige two tone lip bar review
pink step can be as subtle or as vibrant as this one

That is all my review for today. I hope this post wasn't too confusing as it is now 3.30am here so I'm sorry if there are misspelled words too xD Anyway, I highly recommend this lippie if you're into glossy lips with gradient effect. 

Have you tried this lipstick? Which color do you like more?

Thank you for reading and see you on my next makeup post! :D 


Disclaimer: The product mentions above (the pink salmon) was sent to me for review purposes. However all thoughts and opinions are honest and entirely my own.

Vassen Crystal Green Circle Lens Review

$
0
0
vassen crystal circle lens review

Happy Lunar New Year!

As promised in my last circle lens post, I'm going to show you the crystal circle lens also by Vassen, in green color. I wasn't aware that I already have the same crystal circle lens when I ordered this one. Luckily I got another color, which is green. This lens is also known as i.Fairy Super Crystal. Green isn't what I have in mind whenever I am looking for new circle lens. Normally, I'd look for brown or grey, mostly brown which is more wearable. And even if I wanna go crazy wearing non neutral colors, I'd go for purple. I had green circle lens before but none really fascinated me in a good way that made me wanna get it again. I just thought I don't really suit green eyes haha. 

Until I got so obsessed with Love Live anime. Are there other Love Live fans reading my blog? Haha well, if you're familiar with Love Live, (not Sunshine, although I also like Aqours) you might know I'm obsessed with Muse girls, especially Nozomi. I have never really cosplayed a character before, other than some character crappy dress ups I did before that wasn't even close to cosplay. I don't think I ever will to be honest, not that I don't want it but it's quite hard for me to find the costume in my size and obviously I'm not talented nor motivated enough to make my own costume xD So I was thinking I might just dress up like Nozomi in her normal clothes and the first thing I'd need was her green eyes, which led me to get a new green circle lens. Phew that was quite a long babbles explaining why I decided to get green lens haha. 

Anyway, keep reading if you're interested to see how these lenses look on my eyes. 


vassen crystal circle lens review i fairy

I received this from Pinky Paradise and as always they were packaged in vial bottles, and came with velcro pad for your hair or fringe, and also the animals lens case. I got the pink one yay.


vassen crystal circle lens review

vassen crystal circle lens review

Since I have reviewed this circle lens before, and this is the exactly same one in different color, you can go ahead and read the full review on my Vassen crystal gray circle lens post. I'm just going to show you the colors and how it looks like in this post with a mini review.

vassen crystal circle lens review

I love how very much green they are on my dark eyes. The green shade is so similar with Nozomi's eyes too so the first time I looked into the mirror wearing these, I was in love....! With the green lens of course, not myself. Just like the gray lens, this green lens has the same comfort. It looks a bit not me with these green lens on, but I adore the color. It doesn't change much under different lighting. I'm sorry I don't have the picture of these lenses on in natural light because I am never home when the sun is out so I can never take the picture, also part of the reasons why this post takes ages to get posted >_< 

But overall, crystal circle lenses are so far my latest favorite. I really don't have anything bad I can say about it, despite the lack of enlargement. I don't mind so much with the not so enlarging size, because it's what I prefer lately. So all I can say is, this is the perfect circle lens if you're looking for green lenses that are pretty and comfortable ( I swear all Vassen lenses are so comfortable based on my experience). But regarding comfort level, please know your eyes and notice the recommended usage time. Obviously some people can wear this for over 12 hours, while some with dry eyes would feel it's too drying and might even see redness if worn for that long. As far as I know, these type of lenses aren't meant to be worn for that long anyway. For me personally, I wear this no longer than 7-8 hours and that's the max for me. Also, since I know my eyes tend to get dry real fast especially in air conditioned room, I always have my soft lens eyedrops with me, I use Rohto, the blue one for contacts wearers. And keep your fingers clean before touching them and putting them on and removing them off your eyes.  

You can get Vassen Crystal Green on Pinky Paradise for $23.90

vassen crystal circle lens review

vassen crystal circle lens review i fairy

And that concludes today's review. I'm wearing Laura Mercier Lip Glace in Nectar on these pictures by the way. Not sure if I should review this since it's like everyone has at least one of this lol. 

Thank you for reading this mini review, hope it helps ^^ See you again on my next post~


Disclaimer: The product mentions above was sent to me for review purposes. All my thoughts and opinions expressed are honest and entirely my own. I didn't get paid or commissioned to write this post.

Canmake Strong Eyes Liner Review

$
0
0
canmake eyeliner strong black review felt tip

Initially, I wanted to write and publish this post last year, a month after I tried this product. But due to some RL circumstances, this post had to be delayed until now. I've had this eyeliner for a year now and before I even start this full review, I just want to say this is my most absolute favorite eyeliner ever! It's quite similar to my previous favorite felt tip liner which was IOPE Line Defining Eyeliner that I posted before. Since early 2016 until recently, I only used this Canmake eyeliner after my IOPE eyeliner ran out so I guess it says a lot how much I love this liner and how it works on me. 

So despite it's been too long since I got this eyeliner, I still want to share the greatness about this product to you. Keep reading to find out more about this eyeliner :D


canmake eyeliner felt tip black

canmake eyeliner felt tip black

Canmake Strong Eyes is a brush tipped liquid liner. Canmake is a Japanese brand. The packaging is just a normal plastic-y pen with cap. As it's a brush tip, I always wipe the tip with tissue once I finish using it so there is no glitters or powder or eye shadow residue left on the tip that might make the product dry faster than it's supposed to. The tip isn't too stiff or hard, so it doesn't hurt the eyelids when using it. 

canmake eyeliner strong felt tip black

During this first ink test, I wasn't impressed with its pigmentation. It looked like a cheap so so felt tip liner to me at first. The ink isn't the blackest black I ever saw and might look just like any other drugstore eyeliners that might run out or even dry out in couple months. But no, even after a year I still have the same one. I don't wear this everyday though, but it's been used for a good fair amount and if you know me, I don't only brush and make one line each eye per use. I love thick eyeliner, so yeah I apply it a lot over and over again each use.

For the water test, I notice it's not so waterproof. It doesn't actually disappear once water poured on it. It fades a little bit but majority of the ink stays in place. So when you accidentally get splashed with water (ala Korean dramas and the likes) or even rain, I guess if you apply it good and quite thick, the eyeliner will still on as long as you don't smudge or rub it while it's still wet. Once it's wet and you rub it, it will turn into little debris like shown in the right picture. The cons? It sucks it's not so waterproof and not smudgeproof. The pro? It is a quick way to remove the eyeliner and won't need to rub your skin so hard just to take it off. 

PROS
- Affordable
- Long lasting
- Lining eyes and drawing winged liner is so much easier 
- Easy to remove
- More precision with the tip

CONS
- Not fully waterproof and smudgeproof

VERDICT 4.5/5
I don't have oily eyelids but before I apply any eye makeup I always put on concealer or primer as base and with the eyeshadow act as powder, the eyeliner (and any eyeliner really) stays on longer as long as I don't rub it hard (but then again I never rub my eyes because I have sensitive eyes). Though Canmake Strong Eyes Liner may look just like other eyeliners you tried before, but I have to say that this must be the eyeliner that allows me to easily draw any shape I want without having to use the higher side of the tip if that makes sense. A lot of brush tip liners don't always have its tip let out the liquid liner as easy as the higher parts of the brush. Jordana felt tip eyeliner is one of the examples. The tip just totally dries and that means it's making application on the inner part much harder for me. But not Canmake. I've used this eyeliner a lot in many occasions and it's one of the best eyeliner with felt tip that I've tried. I always draw my inner corner because the inner corner of my eyes are too round, and with Canmake Strong Eyes Liner it's just easy peasy. 

And like I've mentioned above, it's a bummer that it's not fully waterproof and it can easily disappear if I rub it hard when it's wet. But if you stay away from drenching your eyes with water (why would you anyway? Unless you're swimming but then there's other waterproof products you can use if you plan to go swimming with makeup on) and rubbing your eyes, you're good to go. I don't do that, so it's not a big problem for me. In fact, I love how easy it is and with minimal effort I can just remove and erase the eyeliner so quick when I want to. 

So everytime anyone ask how I can draw my inner corner liner so sharp and precise, and why my eyeliner and winged liner look great, well I always tell them (over and over again to some people lol) to get this freaking eyeliner. Seriously, it's my life saver. Like I said, I still have it and it's still running great even after a year so it's totally worth it. Especially, since I got this product with free shopping voucher that I won from a makeup competition sooo yes definitely not regretting everything haha. But I would totally repurchase this once I run out. I actually purchased a new one for my mom because I saw her struggling with her liquid liner.

eyeliner canmake felt tip black vassen crystal circle lens

And here is a super mini compilation of my eye makeup. Jk it's a collage of the Canmake liner on my eyes. If you follow me on facebook and instagram, I think I wear this eyeliner in 80% of my pictures. But these ones I compiled above was ones of the most recent one as you can see in all of them I wear my latest favorite circle lens, Vassen Crystal lenses. There are some days my inner corner liner looks decent and some look bad, but in all those days I always use this Canmake Strong Eyes Liner. No matter how basic or crazy looking my eye makeup is, I always use this eyeliner cause it's so convenient. 

Well, I guess that's all for today's review. I can't believe I post 2 reviews on this weekend haha. Anyway, I'll see you again on my next post~ Have an amazing weekend! 


Disclaimer: The product mentions above was not sent or sponsored by any companies. I am not affiliated with Canmake, nor getting paid to write this post. All thoughts and opinions expressed are honest and entirely my own.


Hera Easy Styling Eyeliner Review

$
0
0
hera easy styling eyeliner review

Hera is one of Korean high end brands that I've always wanted to try. I heard great things about this brand, from their lipsticks to bb cushions since 2 years ago. Last year, I decided to try their eyeliner because I'm quite an eyeliner addict, I always want to find new eyeliners that might stay on better on my eyes. I had good experience with IOPE eyeliner, so I always want to try other eyeliners from similar brands like Hera. I was totally excited to try this product, especially because this eyeliner has a quiet unique mechanism which I will show you more in this post.

Keep reading if you're interested to find out more about this product.


hera easy styling eyeliner review

Except for the product name, almost everything else on the box packaging is all in Korean.

hera easy styling eyeliner review

They include a piece of paper that explains how this product works. It's in Korean but there are some pictures on the side that's pretty self explanatory.

hera easy styling eyeliner review

hera easy styling eyeliner review

The first time I received this eyeliner and opened the cap, the brush tip was all white. There's the twist on the upper part of the pen, and once it's twisted, the product comes out of the brush. Be careful, if the brush is not white then it's not brand new.

hera easy styling eyeliner review

Like this. This was when I was so noob I twisted too much, not knowing the liquid liner would pour this much. So 1-2 twists is all you need, really. After that the brush will dry out but that's okay cause when you twist again, the liner will come out again on the brush tip. This kind of mechanism is actually quite nice and convenient for eyeliner. There are some eyeliners that dry out so fast even when the cap is closed and the product is unused. I had a couple of eyeliners like that and it was pretty frustrating. However, this Hera eyeliner didn't really amaze me in terms of its ink pigmentation and texture.

hera easy styling eyeliner review

I don't know if it's just me or that this particular product was a bad batch, and in this test photo I did it was still okay ish. But I can't use this eyeliner fully because sometimes when I twist the pen, it's like too watery and not even black watery but looks like some weird colored liquid with some black ink, if that makes sense. It's not drying out, it's still very much liquid-y, which is good for how long I have it in my drawer. But it will never be thick black like how I wanted my eyeliner to be. I really hope it's just a bad batch that I received though. I mean, its price range isn't that affordable (affordable is like $10-15 to me), so it'd suck big time if the others are the same as this one. 

hera easy styling eyeliner review

As usual, I wet my hand with water and rub it hard. Well, part of the liners gets smudged and fades. With max rubbing, it's nearly gone so while I need hard rubbing to make it disappear, it's still not 100% smudgeproof when it's wet, like most felt tip liners I had used before. When it's dry it's a bit harder to vanish with minimal rub or touch. 

hera easy styling eyeliner review

PROS
- Quite interesting twisting mechanism
- Product doesn't dry out fast
- Buildable
- Nice packaging
- Soft brush bristles

CONS
- Not pigmented enough
- Less precision - kinda hard to draw winged liner

VERDICT 3/5
As eyeliner is one of the huge part of my makeup, the pigmentation and ease of use are really important for me. And quite frankly, this one doesn't deliver as much as I hoped, in my opinion. For daily use when you don't need much eyeliner maybe, but this is not for me. The brush tip isn't exactly precise. I always need to draw my inner corner very sharp to make fake inner eye corner and this can't do that. The winged liner I draw with this Hera eyeliner always turns out pretty fail :( This eyeliner doesn't dry out though, it's liquid-y and with the twist it's easily liquid even after months of not using and opening it. Once again, I really hope the one I got is just a very bad batch. It's just a disappointing product for me cause I had high expectation for this to be at least like IOPE eyeliner, but it's not even close. So I had to give a very low score. But again, tbis is just my opinion based on my personal experience of the product I got. I really hope the others in the market don't turn out like mine though. 

WHERE TO GET
Jolse for $21


Disclosure: The product mentioned above was sent to me for review purposes. However all thoughts and opinions expressed are honest and entirely my own. I do not get paid to write this post.

OPI Axxium & Madam Glam Soak Off Top Gel Review

$
0
0
opi axxium madam glam soak off top gel nail review


The world feels like a much brighter place when you see your dull freshly filed and buffed acrylic nails gets sealed by your shiny top coat. At least that's how I feel every single time. I always look forward to getting to that last step everytime I am making new nails because I just love how shiny and beautiful it looks afterwards. But for the longest time, I've used normal nail top coat. About a month ago I decided it was time for me to invest on gel nails and LED lamp for better results. I ordered Madam Glam soak off top gel on their website around New Year because they were having 50% off for most of their products. It was just a perfect chance to get it because I had heard sooo many good things about Madam Glam and saw too many review videos and liked what I saw. But the shipping from the UK took a long while (thanks DHL!) that for almost 3 weeks it got stuck in Germany and I only received the parcel one week ago. So yeah it took a month to get here. I was anxious and impatient that I ordered OPI Axxium top sealer from a local shop here 2 weeks ago while waiting for Madam Glam. So I end up with two gel nails now and I think it'd be interesting to compare both products. 

Both look almost similar, all black with white fonts. I also made a mini review video for this post as well. But I figured I'd write more about it on this blog cause I don't really do great job explaining things verbally. So keep reading if you want to see more about these two products! 


opi axxium madam glam soak off gel top nail review

opi axxium madam glam soak off gel top nail review

opi axxium madam glam soak off gel top nail review

As you can see on the pictures above, one thing I noticed the first time was OPI says that it's a no cleanse top coat. The ingredients list is located on the very bottom of the bottle. Peel the little paper and you can see the ingredients list in that tiny round paper. OPI Axxium was the first one of the two that I tried. It didn't have any instructions how long it'd take to cure so the first time I tried for 60 seconds, just in case. The result is really nice, and after several uses I learned that even in 30 seconds it cures nicely. I love that it has no tacky layers. So it really lives up to its claims, no cleanse top sealer.

Meanwhile, Madam Glam includes the instruction on the back of the bottle, after the ingredients list, that it must be cured with LED light for 30 seconds per coat and with UV light for 2 minutes per coat. The downside is, it leaves tacky residue afterwards (at least for me) but it can easily be removed with rubbing alcohol. Still, when I'm in a rush (and I'm always in a rush) it can be a tad bit inconvenient when I forget that this top gel leaves tacky layer and ends up accidentally touching it and it can be a bit messy. Nothing too much just a tiny bit of my fingerprint stays there lol and I don't like it so I end up applying another coat of the gel on my nail. The great thing about this Madam Glam soak off gel is, I feel like it's more clear and shiny. I don't know if it's just me but I feel more satisfied looking at my nail with Madam Glam top coat. OPI Axxium is so great and convenient but beautiful finish wise, I prefer Madam Glam.

You can watch my short video below to see how it is in motion lol


OPI AXXIUM 

PROS
- Cure quickly no matter how many coats
- No tacky residue

CONS
- Less glass like finish
- Only UV lamp can cure it

WHERE TO BUY
Tailormade Nails

MADAM GLAM
PROS
- Shiny glass finish
- Can be cured with UV and LED lights

CONS
- It leaves tacky layer which has to be removed with alcohol

WHERE TO BUY
Madam Glam

OVERALL
Both has its pro and cons. Finish wise, I love Madam Glam more. But I love that OPI Axxium gel sealer doesn't need to be wiped with alcohol, is fast to cure no matter how many coats I apply on the nail. But to be honest the finish isn't as beautiful as Madam Glam, although the difference isn't that huge but still noticeable to me. So when I have more time to do all fingers without rushing, I'd just use Madam Glam but if I'm already too tired and spent too much time doing my nails that I can't wait to finish it all quickly, I'd use OPI Axxium.

opi axxium madam glam soak off gel nails top coat review

I'm sorry for the ugly dry skin on my fingers and my pinky nail looks not proportional lol. I'm always so bad doing my right nails, especially in such short time. I mixed Tones acrylic glitters with my own glitter mix on my nails and Mia Secret clear. I didn't make a video of this nail set because it's just too simple and easy I think everyone will be bored watching it but the next time I make something more detailed maybe I will try to make the video if anyone wants to see it. As you can see I'm still learning everyday to make a better one as I just tried to make my own since last year and there's barely enough decent acrylics from where I am so I tend to use the same ones that I have haha. But yeah let me know if anyone wants to see it next time~

When I have more time I'll try to upload my makeup videos too >.< But I'm not sure when that will be xD So for now I guess nails only videos on my youtube channel. Please subscribe here if you haven't ^^

Thank you for reading this post, if you made it to the end of this~ That is all and I'll see you on my next makeup post!


Disclosure: The products mentioned above were purchased with my own money. I did not receive them as PR samples nor get paid to write this post.


Valentine's Day Makeup Tutorial

$
0
0

valentine day makeup tutorial


Hey everyone! For the first time ever on my blog, this post will be in both English and Indonesian so please read your desired language ^^ But I apologize for my weird sounding Indonesian in advance.

Hai semua! Untuk pertama kalinya di blog ku, post kali ini ada dalam dua bahasa, Inggris dan Indonesia jadi silakan membaca bahasa yang di inginkan ya ^^ Tapi sebelumnya aku minta maaf untuk bahasa Indonesia ku yang mungkin terdengar aneh.

Valentine's Day is just around the corner and with that, I and my friend, Via from All About Via blog are making a Valentine's Day makeup look. Honestly for the past few years I didn't care much about Valentine's day makeup as I never had a date on that day since 2013 lol. Well, because my boyfriend is never here around February so my Valentine's Day is usually around June-July when he comes here. That's why I never really bothered with looking great on Valentine's day haha (not that I look great on June/July cause I don't really dress up unless I have to when he's around). This year is no exception. I still have no Val's day date, but that doesn't mean I don't want to doll up. I feel like I dolled up more often recently for no apparent reason, except for the reason that I love playing with makeup so much lol. Anyway, this look of mine might be a little too much for some but this will fit also for anyone who's not doing anything special on Valentine's Day, like me. It may be a bit too glittery and over the top but hey not only people with dates can doll up and looking pretty on this day.

Valentine Day kali ini sudah dekat dan karena itu, aku dan temanku Via dari All About Via membuat makeup untuk Valentine. Sejujurnya selama beberapa tahun terakhir ini aku nggak begitu peduli tentang makeup di hari Valentine berhubung aku ngga pernah nge-date di hari Valentine sejak tahun 2013 haha. Karena pacarku ngga pernah ada di sini pada bulan Februari jadi hari Valentine ku biasanya sekitar Juni-Juli saat dia datang ke sini. Karena itu aku ngga pernah peduli akan berpenampilan cantik di hari Valentine (biarpun aku tetap ngga kelihatan cantik saat hari Valentine ku di bulan Juni-Juli karena aku memang jarang dandan saat pacarku ada disini kecuali ada acara atau hal lain yang membuatku harus dandan). Tahun ini bukan pengecualian. Aku masih ngga punya date di hari Valentine, tapi itu bukan berarti aku ngga ingin berdandan. Rasanya aku lebih sering dandan akhir-akhir ini tanpa alasan yang khusus, selain karena begitu sukanya aku bermain dengan makeup haha. Anyway, tampilan makeup ku mungkin agak sedikit berlebihan untuk beberapa orang, tapi ini juga cocok untuk siapapun yang ngga punya acara spesial di hari Valentine, seperti aku. Ini juga mungkin terlalu ber-glitter dan berlebihan tapi hei ngga cuma orang-orang yang punya acara dan pacar aja yang bisa berdandan dan terlihat cantik dan spesial di hari Valentine.

If you're interested to see how I created this look, please read more. 

Kalau kamu tertarik melihat gimana aku membuat tampilan ini, silakan dibaca terus ya.


I don't do full tutorial cause it's just the basic foundation and etc that I'm sure everyone already knows how to. I focus more on my eye makeup and lips for this look.

Aku ngga buat tutorial secara full karena selebihnya itu cuma makeup dasar dan foundation dan lain-lain yang sepertinya semua orang sudah tahu gimana cara pakainya. Aku fokuskan lebih ke makeup mata dan bibirku untuk tampilan makeup kali ini. 

Products I used:

MAC Prolongwear Foundation NC 20
Anastasia Beverly Hills Dipbrow Pomade in taupe
Sleek i-Divine Matte V1 Palette
Morphe Brushes 35F Palette
Maybelline Hyper Gloss Eyeliner
Lancome Hypnose Star Mascara in Noir Midnight 
Maybelline Fit Me Concealer in Fair and Light
Eye Kandy Liquid Sugar
Eye Kandy Glitters in Jawbreaker
Sephora Rouge Infusion Lip Stain in Peony

valentine makeup metallic tutorial

After base makeup, foundation, and eyebrows, I start with priming my eyes and apply white eyeshadow just below the eyebrows. I like my upper part of my eyes looking nice and clean.

Setelah makeup dasar, foundation dan alis, aku mulai dengan primer di kelopak mata kemudian memulas eyeshadow putih di bawah alis ku. Aku suka bagian atas kelopak mata ku terlihat bersih. 

Now the first step. 

1. I put on pink eyeshadow as transition and I pack on more reddish pink on my crease. I keep on blending the upper part of the crease so it won't look harsh. It's okay if it looks messy at this point because I clean all the mess on step 2.

2. Once I'm done with the pink on the crease, with either angled brush or small tapered brush I erase and shape my eyelids with concealer. It can also be with eyeshadow primer, but I prefer concealer. Shape it the way you want it to be, but it should be a little above your natural eyelids to create the fake crease. 

3. Apply silver eyeshadow or glitters (in this tutorial I use fine glitters) with brush. Be careful while applying around the line of the newly fake crease as we want it to look still like a sharp line. 

4. I extend the silver eyeshadow to make a tail and then I apply red eyeshadow slightly on the lower lash line. And to make the eyes pop more, I put on sparkly white eye shadows on my inner corner, and blend it to where the red eyeshadow on the lower lash line is. 

5. I put on more silver eyeshadow (glitters) on the lower lash line and connect it to the one I have on my upper lids. Then I draw my winged liner. 

6. Put on your favorite red or maroon red lipstick. And honestly you can stop at this point if you're already satisfied with it (but I am not). 

7. This is totally optional. With small tapered brush, I  dip it into glitter liquid and then use the brush to grab some pink glitters. I start putting on the glitters on the center part of my lips and slowly also carefully spread it to the left and right, but I leave the corner of my lips glitter free. 


Sekarang, langkah pertama.

1. Aku bubuhkan eyeshadow pink sebagai warna transisi dan aku pulaskan eyeshadow pink kemerahan di kelopak mataku sampai tercipta warna yang aku inginkan. Aku blending terus di bagian atas kelopak mataku sehingga lebih halus dan tidak ada garis kasar. Ngga apa-apa kalau di bagian ini bagian bawah kelopak terlihat berantakan karena nanti bisa dibersihkan di langkah kedua. 

2. Setelah selesai dengan warna pink di bagian atas kelopak, dengan angled brush atau tapered brush kecil aku hapus dan bentuk lipatan mata ku dengan concealer. Bisa juga dengan menggunakan eyeshadow primer, tetapi aku lebih suka dengan concealer. Bentuk sesuai dengan yang kamu inginkan, tetapi harus sedikit lebih tinggi di atas lipatan mata asli mu untuk menciptakan lipatan palsu yang sedang kita buat. 

3. Bubuhkan eyeshadow silver tau bisa juga memakai glitter (seperti yang aku pakai di tutorial ini) dengan brush tipis dan kalau bisa yang ujungnya rata atau angled untuk memudahkan. Hati-hati saat membubuhkan eyeshadow di sekitar garis lipatan mata yang baru saja kita buat, agar garis lipatan mata tetap terlihat tajam dan bersih.

4. Aku panjangkan eyeshadow silver nya seperti buntut dan aku bubuhkan eyeshadow merah di bagian bawah mata. Lalu aku bubuhkan juga eyeshadow putih di ujung mata, dan di blending ke eyeshadow merah di bawah mata. 

5.Lalu aku pakai juga eyeshadow silver nya di bawah mata dan disambungkan ke ujung luar mata ke bagian atas. Lalu aku gambar winged liner ku. 

6. Pulaskan lipstik warna merah atau merah marun favorit kamu. Sebetulnya kamu sudah bisa stop sampai di sini kalau kamu sudah puas dengan hasilnya (tetapi aku belum puas).

7. Ini ngga perlu diikuti kalau kamu sudah puas sampai tahap 6. Dengan brush tapered yang kecil, aku masukan ke cairan glitter dan gunakan brush tadi untuk mengambil glitter pink. Aku mulai membubuhkan glitter pink di bibir bagian tengah, atas dan bawah. Lalu perlahan aku sebarkan ke kanan dan kirinya, tetapi aku biarkan ujung bibir tanpa glitter. 

valentine day makeup tutorial metallic glitters

valentine day makeup tutorial glitter metallic

This is my result. Also, a little back story... Me and Via didn't plan how we took the pictures and not even the makeup but we had a good laugh when we noticed that our clothes were both maroon as if we planned it. Anyway, visit Via's blog too for her makeup look. Her Valentine's day makeup is more wearable and pretty too, fit for girly everyday look as well.

Thank you all for reading, and hopefully next time I can make video instead of pictures with poor explanations. So that is all for today's post and happy Valentine's Day!


Ini hasilnya. Oh ya, ada sedikit cerita juga... Aku dan Via ngga merencanakan gimana kita akan ambil fotonya dan bahkan ngga berencana soal makeup kita, tapi kita tertawa sewaktu kita sadar baju yang kita pakai warna nya sama seolah-olah direncanain. Anyway, kunjungi blog nya Via juga ya untuk ngelihat hasil makeup nya. Makeup Valentine nya Via lebih bisa dipakai dan cantik, cocok untuk tampilan girly sehari-hari juga.

Terima kasih sudah baca post ku kali ini, dan semoga lain kali aku bisa membuat video ketimbang foto-foto seperti ini dengan penjelasan yang mungkin kurang jelas. Jadi itu aja untuk post hari ini dan selamat hari Valentine!

Follow me on my instagram for more makeup looks! I post 2-3 makeup looks or more on good days in a week on my instagram @misaraisu


Disclosure: All products mentioned above were all purchased by me. None of them were sponsored nor affiliated with me. 
 

Must Have Lead Free Lipsticks

$
0
0


I love makeup so much! Especially recently, I love playing with various makeup products and colors even more. I think I put on makeup more than I ever did before. I know some makeup products can be real dangerous for not only my skin, but also health in the long run. I admit I didn't thoroughly read the ingredients list of the makeup and skincare products I've been using lately, until I read various articles about the dangerous ingredients that are found in many daily cosmetics and toiletries that people, including myself, use everyday.

As a makeup addict, I've heard some of the dangerous ingredients that shouldn't have been in one of the many products that I use. I read about them countless times before, especially ingredients like paraben, talc, mica and the likes. But after reading more about it these past few weeks, there are just more than that. That is including lead, an ingredient that's often found in most lipsticks. I read more about some lippies products that's been known as products with the most lead, and I was shocked to see some of the mainstream cosmetics brands like Maybelline, L'oreal, NARS, and Revlon are included in the list. I'm sure there are more brands whose products contain lead which can affect our health. And that's just one of the 7 known dangerous ingredients.

Keep reading to learn more. 


There are those 7 and more dangerous ingredients that we might overlook in our everyday makeup products. Parabens, talcum powder (talc), phthalates, formaldehyde, lead, diethanolamine, retinyl palmitate. You can read more in details about them here.

Today I want to talk more about lead as it's found mostly on lipsticks and I use a lot of lips products and often peeled my dry skin on the lips and ended up getting them in my mouth. I know now how unhealthy it is and dangerous as well. According to The Environmental Working Group, lead is not only unsafe to use for cosmetics, it can also causes allergic and cancer. 

And according to Safe Cosmetics, the recent science indicates that there is no safe levels of lead exposure. Lead is a neurotoxin, which means toxins that are poisonous or destructive to nerve tissue and can be dangerous at small doses. Medical experts are clear that any level of lead exposure is unhealthy. Some of the health concerns including causing learning, language and behavioral problems, reducing fertility in both men and women, hormonal changes and menstrual irregularities, also delayed onset of puberty in girls and development of testes in boys.
The recent science indicates there is no safe level of lead exposure. Lead is a neurotoxin and can be dangerous at small doses. Medical experts are clear that any level of lead exposure is unhealthy. - See more at: http://www.safecosmetics.org/get-the-facts/regulations/us-laws/lead-in-lipstick/#sthash.REgzP1Bw.dpuf


We may not know if a lip product contains lead or not, and if you don't see it on your products ingredients list that doesn't mean it is safe and lead free. Why? Because lead isn't listed on the ingredients list on the product or even on the brands websites. According to some sources, lead comes from the colors that's used to create the lipstick. FDA stated, more than 99% lip products contain lead at levels below 10ppm, which they consider very small that will not result in detectable levels of lead in blood even if it's accidentally absorbed through the skin or swallowed when people lick their lips. But still, no amount of lead, even just a small trace, is considered safe. 

So even though FDA already issues a guidance in limiting lead to 10 ppm in lip products, it's still not guaranteed that it'll be alright to keep indirectly and coincidentally 'consuming' small traces of lead. I find it really hard too personally as I'm lips products hoarder. There are still a lot of products I haven't fully used or emptied. But after reading all this, I just can't ignore the things I learn about lead. Of course, lead isn't only in cosmetics, but also food, air, and everything on this earth. But I think it would be better to start avoiding using cosmetics that I have that may contain lead.

I found some organics lipstick products that are natural based, vegan and cruelty free that can be good alternatives. These prudtcs are also in my wishlist now.

lead free lipstick 100 percent pure
100% PURE - Fruit Pigmented Pomegranate Oil Anti Aging Lipstick
$29

Details
Anti-aging, super moisturizing lipstick concentrated with pomegranate oil, shea butter and colored from fruit pigments to keep lips super soft and youthful. Antioxidant and vitamin packed. Truly 100% Pure - no synthetic chemicals, synthetic dyes, chemical preservatives or any other toxins.
  
Ingredients
Butyrospermum Parkii (Organic Shea Butter)*, Punica Granatum (Organic Pomegranate) Seed Oil*, Theobroma Cacao (Organic Cocoa) Seed Butter*, Extracts of Prunus Cerasus (Organic Cherry) Fruit*, Prunus Domestica (Organic Plum) Fruit*, Vitis Vinifera (Cabernet Grape) Fruit*, Rubus Idaeus (Organic Raspberry) Fruit*, Vaccinium Angustifolium (Organic Blueberry) Fruit*, Rubus Fruticosus (Organic Blackberry) Fruit*, Prunus Persica (Organic Peach) Fruit*, Prunus Armeniaca (Organic Apricot) Fruit*, Solanum Lycopersicum (Organic Tomato) Fruit/Leaf/Stem*, Punica Granatum (Organic Pomegranate)*, Cacao (Organic Chocolate)*, Rosa Centifolia (Organic Rose Petals) Flower*, Lavandula Angustifolia (Organic Lavender) Flower/Leaf/Stem*, Theobroma Cacao (Cocoa) Powder, Tocopherol (Vitamin E), Sodium Ascorbate (Vitamin C), Euphorbia Cerifera (Candelilla) Wax, Rosmarinus Officinalis (Rosemary) Leaf Extract * Certified Organic
lead free lipstick vapour

VAPOUR - Siren Lipstick
$25

Details
Treat lips to an infusion of beautifying organic botanicals—including Pomegranate and Rose—with show-stopping color. Silky and moisture-rich, Siren is the industry’s healthiest lipstick, and the full-coverage shades are beloved by beauty enthusiasts across the globe. Achieve rich, classic, luscious color that lasts and lasts. It says to be 100% natural, 70% organics ingredients, and 30% minerals and essentials oils. It's chemical free, cruelty free, made with wind power, no nano particles, no irradiation, biodegradable ingredients, and with recyclable inner and outer packaging.

Ingredients
Organic Ricinus Communis (Castor) Seed Oil
Organic Cera Alba (Beeswax)
Castor Isostearate Beeswax Succinate*
Mica
Organic Simmondsia Chinensis (Jojoba) Seed Oil
Organic Prunus Domesticus (Plum) & Prunus Armeniaca (Apricot) Flavor Oil
Organic Punica Granatum (Pomegranate) Seed Oil
Solanum Lycopersicon (Tomato) Fruit/Leaf/Stem Extract
Organic Camelina Sativa Oil
Organic Rosa Damascena (Rose) Bud Extract
Organic Melissa Officinalis (Lemon Balm) Leaf Extract
Wildcrafted Commiphora Myrrha (Myrrh) Gum
Stevia Rebaudiana (Stevia) Leaf Extract
Tocopherol (Non GMO Vitamin E–Soy)
[+/–: Titanium Dioxide (CI 77891), Iron Oxides (CI 77491, 77492, 77499), Carmine (CI 75470), Manganese Violet (CI 77742)]
* Eco Cert Ingredient
lead free lipstick natural organics
W3LL PEOPLE - Nudist Colorbalm 
$13.99


Details
The love child of a lip stick and a lip balm, The Nudist gives lips a subtle boost of color and shine plus penetrating, nourishing hydration. Rich in organic omega oils and aloe, this luxury lip treat leaves stressed lips soothed, supple and protected. Clothing optional.  

Ingredients
Castor Isostearate Succinate, Acacia Decurrens/Jojoba, Tribehenin, Oleic/linoleic/linolenic polyglycerides, Euphorbia Cerifera (Candelila Wax)*, Simmondsia Chinensis (Jojoba Oil)*, Helianthus Annuus (Sunflower) Seed Oil*, zinc oxide, Rubus Idaeus (Red Raspberry) Seed Oil*, Daucus Carota Sativa (Carrot) Seed Oil*, Mixed Tocopherols, Iron Oxides, Mica, Manganese Violet, Camellia Sinensis Leaf Extract*, Spearmint Oil*, Vanilla Planifolia Fruit (or) Vanilla Tahitensis Fruit* *Certified organic

lead free lipstick natural organics
ILIA - In My Room Lipstick
$26

Details
A shade for every skin tone, In My Room’s soft tones of pink and brown make this the perfect go to for a dressed down pout.
100% natural dye
ILIA Lipstick combines organic ingredients with contemporary colors blended into a creamy semi-matte finish. Mix with ILIA Tinted Lip Conditioners to moisten lips and revive color in between application. The quality of the product is mirrored in its packaging. All cream lip products are housed in a sleek recycled aluminum case. Each product is filled with up to 85% bioactive organic ingredients. A combination of on trend pigments and super nourishing elements has set ILIA apart from the conventions of organic beauty.

Ingredients
Ricinus Communis (Castor) Seed Oil*, Sesamum Indicum (Sesame) Seed Oil*, Helianthus Annuus (Sunflower) Seed Oil*, Beeswax (Cera Alba)*, Triisostearyl Citrate, Euphorbia Cerifera (Candelilla) Wax, Theobroma Cacao (Cocoa) Seed Butter*, Zea Mays (Corn) Starch*, Linum Usitatissimum (Linseed) Flax Seed*, Olea Europaea (Olive) Fruit Oil*, Rosa Canina (Rosehip) Seed Oil*, Salvia Officinalis (Sage) Leaf*, Tocopherol. May contain: Mica, Titanium Dioxide CI77891, Black Oxide CI77499, Yellow Oxide CI77492, Red Oxide CI77491, Red 7 CI15850, Red 28 CI45410, Yellow 5 CI19140. *Certified Organic Ingredients. Ingrédients Certifiés Biologiques.

 ISOI - Bulgarian Rose Lip Treatment Balm
$18.15 on KoreaDepart 

 Details
Non-toxic, no artificial fragrance or chemical colorant (free of paraben and preservatives)
Creates a protective shield around rough, chapped lips
Natural ingredients like Bulgarian rose oil, Bees-wax and Rosehip oil provide moisture for cracked lips, leaving them soft and supple

 Ingredients
Bulgarian Rose Lip Treatment Balm(Red Color)
Ricinus Communis (Castor) Seed Oil, Euphorbia Cerifera (Candelilla) Wax, Simmondsia Chinensis (Jojoba) Seed Oil, Rosa Canina Fruit Oil, Macadamia Ternifolia Seed Oil, Rosa Damascena Flower Oil, Vitis Vinifera (Grape) Seed Oil, Copernicia Cerifera (Carnauba) Wax, Beeswax, Polyglyceryl-3 Polyricinoleate, Tocopheryl Acetate, Sodium Citrate, Dextrin, Carmine, Potassium Alum
Bulgarian Rose Lip Treatment Balm(Pink Color)
Dimer Dilinoleyl Diisostearate, Hydrogenated Castor Oil, Beeswax, Butyrospermum Parkii (Shea) Butter, Rosa Canina Fruit Oil, Macadamia Ternifolia Seed Oil, Vitis Vinifera (Grape) Seed Oil, Tocopheryl Acetate, Rosa Damascena Flower Oil, Polyglyceryl-3 Polyricinoleate, Dextrin, Carmine, Sodium Citrate, Potassium Alum


That is all for today's post. Hope this can be hepful~ Have you tried some of these lipsticks or the other cosmetics from these brands?


Disclosure: This is not a sponsored post. I'm not affiliated with the brands mention in this post.

Princess Pinky Gemini Night Circle Lens Review

$
0
0
circle lens brown review

When it comes to circle lens, lately I prefer to wear natural colors like brown. I have only brown colors mostly with 1-2 grey and green colors in my circle lens collection. While in the past I used to want only big circle lens with thick black rims to emphasize and enlarge my eyes, lately I want smaller (around 14.5mm) diameters circle lens. I guess I grew up? lol 

Anyway, today I'll be reviewing Princess Pinky Night Gemini circle lens in brown color. Initially I wanted to try the grey color but the brown circle lens on the ad was so beautiful and I ended up getting the brown one. If you're interested to see more of this circle lens please read more.


princess pinky gemini brown circle lens

I got velcro hair clip and animal case that came with the circle lens box.

princess pinky gemini brown circle lens

The circle lens is packaged in this cute pink and black box with some details shown on the box.

princess pinky gemini brown circle lens

On the side of the box, it displays the other colors that this circle lens series have which are blue, grey, green and brown.

princess pinky gemini brown circle lens

Thank god for no vial bottles :D Sure vial bottles feel more secure but the cap removing process is usually not so convenient for me. This one is packaged in a plastic-y container and all I had to do was tear the silver seal with no hassle. The description of this circle lens is printed on top of the seal. The diameter is 14.5mm with 8.80 curve and contains 42% water. It will expired in 2021, which I believe you can store it in your drawer until 2020 and you can still unseal it by 2021 and wear it just fine. But with any contacts, I suggest to change and remove them from your collection every 6 to 12 months once you unsealed them. But in this case, Princess Pinky lens can only last for 30 days. That means once you open and wear it, you can only wear it for the next 30 days because it's a monthly circle lens.

princess pinky gemini brown circle lens

The design is pretty much just around the center part of the lens. The first time I saw it after I unboxed the lens I was like, wait that's it? I knew I didn't expect this to be enlarging much like my other circle lenses but these lenses are clearly not going to enlarge anything. The color is light yellow except around the design which is more of medium darker yellow. This got me worried as well, I was worried once worn, my eyes would not even look light brown like the ad lol but.... 

princess pinky gemini brown circle lens

The color looks more grey ish green on me? I'm glad though that the color looks pretty, even though it's not so brown on me. I actually really like the color. I never had or wore this kind of circle lens color before. The downside is this circle lens doesn't give any enlargement, as you can see around the outside of my iris. They yellow leftover part can be seen during closeup but not so much on normal viewing distance. It can fit eyes people with bigger iris as it has 14.5mm diameter.

I've always said this on most of my circle lens reviews on this blog, that my eyes love Vassen lenses so much that it tends to be more sensitive and reddish wearing other brands. And this one is included. I guess it's just me though thanks to my ultra sensitive eyes. I saw other bloggers that love this circle lens, so for people with sensitive eyes like me, Princess Pinky Gemini might not be for you. It's actually not that severe it's just a little not so comfortable as Vassen lenses I used and had. I wore this for 6 hours and I felt like I needed to remove this at the 5th hour. But I'm also someone who can't wear EOS circle lens for a long time, for your reference. This one isn't uncomfortable, but not exactly super comfortable either according to my sensitive eyes. I had to use lens lubricant drops more often than usual while wearing Princess Pinky.

Aside of that, I'm pretty in love with this circle lens, especially the color. You can have the darkest eye color and your eyes will look up to 3 shades lighter with this. The result wearing this circle lens is very natural and perfect for daily wear.

princess pinky gemini circle lens review misaraisu

MY RATING

DESIGN/COLOR
ENLARGEMENT
COMFORT
OVERALL

WHERE TO GET
Pinky Paradise for $11.90

That is all for today's review. Thank you for reading this post, hopefully it helps :)


Disclosure: The product mentioned above was sent to me for review purposes however all thoughts and opinions expressed are honest and 100% my own. I do not get paid to write any positive reviews.


LED Mirror Review

$
0
0
led mirror review

Hello again~ 

As you can see from the title picture above, yes, this post is not going to be about beauty or makeup related. But this post might be relevant to you girls (and guys) who want to add another twinkling mirror on your vanity. You may already have 3-4 mirrors standing on your dressing table, not to mention few other compact mirrors you already store in your drawers. But we can never have too many mirrors, am I right? I've been looking for LED mirror for a while now. Mostly are huge and expensive, totally out of my budget range while the rest that I found are overpriced. I have my ring light that I place between my desk and the wall, but it's just too much and too bright to use when I need to put my makeup on once the sun is down. I do have my table lamp (also LED) but the light isn't enough for my glam makeup prep lol while the lighting on my room isn't that ideal either. So, I'm glad to have found this fancy but affordable mirror!

With that being said, if you're still interested to know more about the mirror I just got here, please read more :)


I received the package from tosave shop and it came with bubble wrap and instructions.


Once it's unboxed, the mirror was also wrapped with bubble wrap so it came to me in one piece. At first I was worried the mirror would be cracked or something during shipping. But phew it was all alright.

led mirror review misaraisu

The mirror was protected by another layer of protective film paper. The mirror size in centimeters is 25.5 x 18.5 cm. There's another instruction label near the button thing. It says turn on the switch at the rear and press & hold to adjust brightness. 


The back side of the mirror. It looks like photo frame with a switch. In the middle part, there's the place for the batteries. For this mirror, the batteries needed are 4 AA batteries. Once they were placed correctly, I turned on the switch in the back.

led mirror review

To turn on the LED lights, I just had to touch the circle button on the center of the mirror. What's cool about this mirror is I could adjust the brightness and make it more brighter with holding on the button longer until it was the brightest (if I want to). To turn if off, I just need to touch the button again once and it'd be off.


Look at those lights! It's not edited so it's pretty much 98% of what it will look like in person, except it's a tad bit brighter in real life. There are 16 lights in this mirror so it's the perfect led mirror even in your darkest room, and also to flaunt your glam highlight.

led mirror review misaraisu

This was taken at night without any room lighting, and just with mirror lights cause I want to show you how quite bright it is even without any lights. I mean, sure I've seen brighter led mirror like those hollywood style mirror but the price is surely different by a lot. So for its price, this mirror and its lights and brightness are really amazing to me.

led mirror review misaraisu
taken with camera
led mirror misaraisu
taken with beautyplus app using front camera

Both selfies were taken with the mirror in front of me. The first one was taken with camera and the last one with beautyplus app on my phone. The app adds additional brightness though so that is why it's brighter (and that's why I use it so often lol). But I like that this lighting is so perfect for my phone selfies. I didn't turn on my ring light and it appears to have enough brightness (with the beauty app too) which is amazing to me, still. Honestly, with ring light my eyes get so red and watery I can't handle it sometimes haha. But this LED mirror is apparently the answers to my constant "not perfect lights" whining whenever I'm having my selfie session, not to mention that my ring light tends to wash out my makeup and skin so this is the more reason I use the mirror more often lately. But of course, for makeup photos I still need my ring light and camera lol. But hey for people who don't want to invest $100-250 for a ring light, this might be a cheaper solution with almost similar result if you have the right app on your phone!

This mirror is only $13.68 on tosave website and it has 3 colors options: black (mine), pink and white. They also ship worldwide.

For my personal rating, I give this a 5 stars because I love it that much. I've been eyeing this exact mirror on many sellers on ebay for the longest time. While there are varieties of models but they all priced around $18-20 and up to $30. So I wasn't joking when I said this mirror is affordable. Plus, with all those lights and brightness, I wouldn't have any complaints ^-^ 


Well, I hope I didn't babble and rant too much on this post. It's been a while since I posted something fun like this one. I guess I do miss blogging a lot haha. I'll try to post more often I promise I already have many photos transferred from my camera to laptop. I just need to edit them to be more presentable and then start babbling again on my posts like I used to. Hope you like this post though!

Do you already have your favorite mirror on your dressing table? What kind of mirrors do you use?


Disclosure: The product mentioned above was sent to me for review purposes however all thoughts and opinions expressed are honest and entirely my own. I do NOT get paid to write this post and say positive things.

Online Shopping in the US Just Got Easier

$
0
0

online shopping mymallbox review

Living in Indonesia can be inconvenient at times, especially when all I did was online shopping when I couldn't find the things I needed and wanted here. I resorted to ebay, amazon, and other online stores that's sadly located mainly in the US. Though they actually cost more cheaper than some of what some local sellers offer, but the international shipping fee is something I always need to reconsider again and again before I make a purchase. I mean, if I need to buy 5-7 products from 3 different online stores and different online shopping platforms, then my shipping fee would be 3 times pricier. Not to mention the extra charge for the custom duty and stuff. Knowing how it works here, I'm pretty sure the custom duty fee would be half of the product value so I never really want to shop from the US, even though many of the things that I want are based in the states. I'm lucky enough my boyfriend never complain about the amount of my shopping bags he has to pack among his stuff in his luggage everytime he visits me. But he doesn't come here every month so I can only shop through him once a year (sadly) and how exactly I can wait for a year to get the stuff I need? I can't.

I was excited when I heard about MyMallBox. It is a package forwarding company that surely is a big help for non Americans to shop and get their packages safely to the rest of the world. I got my items in 2 days after MyMallBox shipped it so I couldn't be more excited. 

Read more to learn more about this and get extra credit to your balance for first use.


This is how it works. You get your own US address once you sign up to their website. It's the address that you should put in your shipping details when you shop on any US online stores. Once your order arrives at their warehouse (your US address), your package will stay there for as long as 90 days untouched. Well, obviously you'd want to ship it to your address right away if you're done shopping. But if not, go shop more from other stores and your orders will all be stored in the same warehouse until you're ready to ship to your home address.

If you have difficulties finalizing your order on the store website due to payment issues, don't worry - I know Paypal Indonesia doesn't allow you to ship to US address so it's definitely an issue if you don't have credit card. I had to use my credit card instead of paypal when I shopped at Forever21. MyMallBox can help you shop in the store. Just click Buy For Me option and you can enter the URL of the things you want them to buy, the store name, and other details and then it will add $4.50 Handling fee & a 3% transaction fee.

Once your package has arrived, you will get notified on MyMallBox website and your email.

You can head to the website and on your package page you can choose what to do, consolidate - combine multiple packages in your warehouse into one box to be shipped together to save some shipping fee, or repack - pack all your items in original packages into a new smaller box. 

Aside of Forever21, I also got other things, including Influenster VoxBox (which I will review very soon!) and I chose to consolidate my packages. After one and half day, I checked the website again and my package was consolidated and ready to be shipped. So I did. There were 2 shipping options: DHL Express or USPS. I chose DHL express to ship my 3lbs package and it only cost $34 for the shipping. I compared it with other popular package forwarding services like MyUS and ViaBox and with DHL express they cost $60 something and $310 respectively for the same weight and dimensions. So I can say that MyMallBox is definitely cheaper. You can also save shipping cost if you share with a friend! 


After they processed my package, I got another email that my package is shipped and on its way to me. Honestly I had some problems with DHL around 2 months ago that I didn't expect much. But to my surprise, my package eventually arrived in 2 days to my office! The downside is, I had to pay the custom duty fee that was nearly half of my package value, which really sucks but I knew it'd happen because that's how it is in Indonesia I think. When I read other blog posts that use MyMallBox, they didn't have to pay extra custom fee but I knew it wasn't the case with my country so there's nothing I could do about that lol. At least I got my package so instantly (yes I've never used an express service before) and at least this saves me from paying nearly the same amount of custom duty fee just once (unlike having to pay the same amount per every package that arrives) so I was beyond satisfied. 


I checked my package right away. It was all wrapped safely with huge bubble wrap. All my clothes and makeup are still intact, no damage. 

So my overall opinion about MyMallBox service is it's a really satisfying shopping experience. You don't need any expensive monthly or yearly membership to use their service. The people at MyMallBox are friendly and respond to your messages and questions pretty quickly and ready to help my noob self anytime. They can shop for you (with a little fee) if you have problems with the payment system on some online stores. The website is easy to navigate and I believe with either shipping service you pick will get to you in 2-3 days max. You can also use their shipping calculator to roughly estimate your shipping fee.

Click HERE to get extra $5 credit to your account. When you register, you get $5 to your balance so with my referral link you'll get $10 total to your credit that can help pay your shipping cost.

I'll definitely use their service again when I need to shop in US online stores again!


Disclosure: This post is sponsored by MyMallBox however all thoughts and opinions are honest and entirely my own.

Esqido Mink Lashes and Companion Eyelash Glue Review

$
0
0


My makeup style may have slightly or not so slightly changed over the years, but my love for false lashes remains the same, if not stronger. I used to collect a lot of thick and long false lashes and stack wearing them which not only makes my eyelid feel heavy by the end of the day but also create that super fake lashes look. I mean we all know I'm wearing falsies, but those synthetic lashes really can look unflattering in person. And since the end of 2016 I started buying more mink lashes. Even though most of them are too natural and short for my liking, but I love wearing some that are on the thicker and longer side. I'm still and always on the hunt for more crazier, longer, thicker mink upper and lower lashes on the market so I was excited when a little while ago I was contacted by Esqido, a company that carries our falsies needs, to try some of their products, a pair of beautiful premium mink lashes that I chose and this brilliant eyelash glue.

Without further ado, let's look more into these babies!


esqido mink lashes

Here is the pair of lashes that I'm going to review: Midnight Symphony. It comes in a fancy box case, and the back side has a lot more of descriptions and manufacturing details.

esqido mink lashes

Here is what it looks like when I open the lashes box. It has this fancy magnet case that is quite different from other falsies case that I had before.

esqido 3d premium mink lashes

esqido premium mink lashes

It may not be the longest lashes, but in a glance it surely will give more volume and thought it is quite thicker, it;s still on the natural side. Well, for me anyway. It is quite easy to pull the lashes band from the plastic case and won't require extra strength which will ruin the lashes shape or strands, which sometimes happens with my previous lashes box.

esqido eyelash glue

I also received this eyelash glue called Esqido Companion eyelash glue. The tip is like eyeliner brush and it's pretty flexible. I didn't notice any strong smells whatsoever, and while I didn't touch the glue myself with my finger to check its texture, but upon using the glue with the lashes I can tell that it's not super sticky that makes my life difficult during application. And just like many other eyelash glue, I wait for few seconds after applying the glue on the lash band before I attach the lashes on my lash line. My lashes stay still the whole day even with my hooded eyelids (which usually cause the inner part of the falsies to kinda peeled off after a long day). With the container size, I can guarantee that a little goes a long way!


esqido mink lashes
 Say hello to my downward natural eyelashes. Without these mink lashes, my eyes look meh but I extremely love how beautiful these lashes are!


esqido mink lashes

 esqido mink lashes misaraisu blog

I can't express how much I love these lashes. I love the design, volume and the final look on my eyes with these lashes on. I'm not gonna lie, at the end of the day it kinda feels heavy after wearing these lashes for 9+ hours but the first few hours I barely notice it. But if you're used to wearing big volume falsies, these aren't any different. Plus, it looks extremely natural (to me at least) and thick. It takes me a while to write this review because I wanted to test it again and again (not just one time use) and now I've used these lashes for over 10 times now and they are still in good condition, not even one strand of hair fell down either so far.


Also, Esqido has this reward program that rewards you everytime you place an order on their website and when you refer a friend as you can see above.

FINAL THOUGHTS

I've stated my honest opinion above, but to sum it up, here are my final thoughts about Esqido Midnight Symphony Lashes:

* Nice packaging, no breakage.
* Natural looking mink lashes with beautiful design and volume
* If worn and cared properly (clean the makeup and glue residue and put it back to the eyelash case after every use), it can be used for as long as you want.

My summary for Eqido Companion Eyelash Glue:

* Easy application
* Stick the whole day
* A little goes a long way

Visit Esqido and grab your ESQIDO mink lashes and ESQIDO eyelash glue today.


Disclosure:
The products mentioned above was sent to me as samples for review purposes. I was not financially compensated for this post. The opinions are completely my own based on my experience.


Viewing all 95 articles
Browse latest View live